In publisher you can create
elements from scratch, you can also use your favorite programs to create your
desired objects and place them later on your publication.
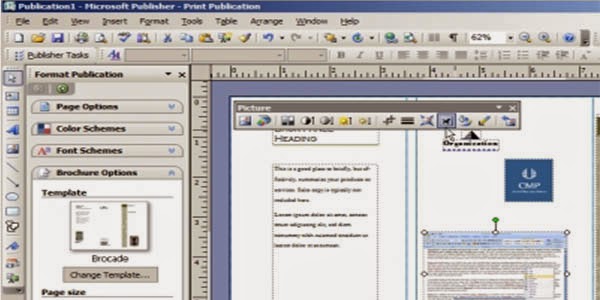
Open your Microsoft publisher and
let us get familiar with it, after opening your publisher you will see the
following:

Title bar – like any other
software, the title bar shows the name of your created file no matter what type
of document.
Menu bar – below title bar you
will find Menu bar. This bar contains Menus that will give the user an access
to the special features and functions of the Microsoft publisher. Everything is
made available from creating publications, even getting help.
Standard toolbar – located right
below Menu Bar, its main function is to control the appearance of your font in
your publication.
Publisher Tasks pane – located again
left side of the screen under standard toolbar, this is often hidden. This will
help guide you steps to complete your publications.
Objects Toolbar – located left
side of the Microsoft publisher screen, this tool will help you create tables,
text boxes and tables.
Publication work-space – located middle
of the screen like a large white box, in short the shape of the box will vary
on what type of publication you have created.
Rulers – like any other office
related software, the ruler is located above and left portion of the document. Design
to align the objects on your page.
Scroll bars – found at the right
and the bottom of the screen, specially created to scroll your entire document
vertically and horizontally.
Page Selection bar – located bottom
left of Microsoft publisher screen, enables the user to quickly shift from one
page to another from your publication. The selection page bar may not be used
for a single page flyer but ideal for a 300 page catalog, meaning for future
use.
No comments:
Post a Comment